


I’ve been making this loaf for longer than I care to remember; it’s a firm family favourite. This is a delicious and nutritious wholegrain loaf. It’s much healthier than your average sourdough bread, containing fewer carbohydrates, less gluten, and more fibre, which generally keeps you feeling fuller for longer.
Rugbrød, this seeded sourdough loaf, is a staple of Danish cuisine, often served at lunches and celebrations such as Christmas and Easter. It is a dense, long-lasting loaf with malty and slightly sour notes, featuring a ragged crust and a moist yet textured crumb. It’s absolutely perfect for open sandwiches. One of the great advantages of this bread is that it stays fresh for days, thanks to its high water content. Not only that, but it’s also lovely toasted.


starter
Essentially, this is the easiest sourdough loaf to make. No kneading, stretching, or folding is required. However, it’s important to use a starter that has been recently fed so that it is highly active. You will begin by placing your required amount of starter in a large bowl. Then, add rye flour and water to create a wet leaven. This is left overnight at room temperature to ferment.
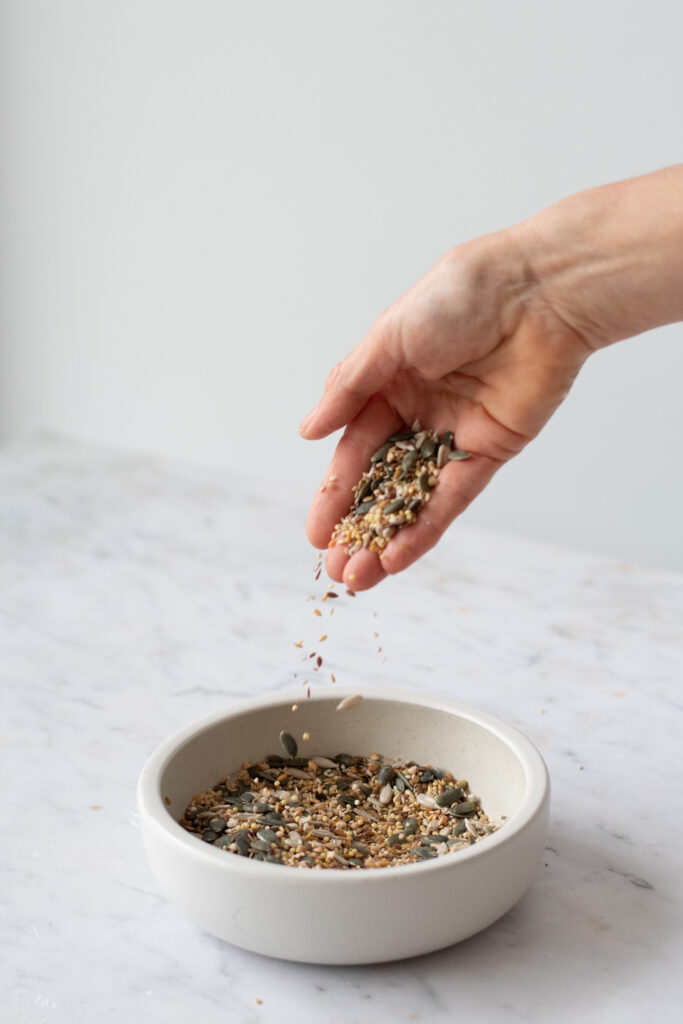
seed blend
This nutritious seed blend combines golden and brown linseeds, sesame, buckwheat, millet, sunflower, and pumpkin seeds, each adding unique flavors, textures, and benefits. Linseeds are rich in omega-3s, sesame seeds offer calcium and antioxidants, while buckwheat and millet provide fiber and gluten-free goodness. Sunflower seeds add crunch and vitamin E, with pumpkin seeds contributing robust flavor and essential minerals like zinc and magnesium.
Soaking this mixture in freshly boiled water not only aids digestion by softening the seeds but also activates enzymes, making their nutrients more bioavailable. This simple step transforms the blend into a nourishing addition that enriches this sourdough rye bread with flavour, nutrition, and a satisfying texture.
proving
Proving time can vary, for me it takes 1 hour and 30 minutes to get to this stage, with a room temperature of 21.5°C. Cracks have appeared on the surface, so it’s time to bake. The optimum temperature for making and proving sourdough is 18°C-23°C.
If you’re new to sourdough baking, this loaf is an excellent place to start. The method is straightforward, yielding delicious and impressive results. This loaf is ideal for open sandwiches, which call for a sturdy, wholesome bread base to support generous toppings such as smoked salmon, prawns with egg, or sliced cheese and tomatoes. The topping options are endless…

Tips:
- I like the addition of caraway seeds – add 2 level teaspoons.
- Store sourdough wrapped in a linen tea towel, followed by a waxed wrap. Sourdough needs to breathe. If you wish to freeze it, place it in a plastic freezer bag. It freezes incredibly well, but remove it from the plastic bag immediately when you want to defrost it, as the ice crystals inside will make the bread damp.
Danish Sourdough Rye Bread (Rugbrød)
Equipment
- 1.5kg loaf tin
Ingredients
Day 1 – Wet Leaven
- 125 g active rye starter 100% hydration
- 230 g dark rye flour
- 290 g cold water
Seeds & chopped rye grains
- 50 g chopped rye grains
- 150 g seed blend ie. golden & brown linseeds, sesame, buckwheat, millet, sunflower & pumpkin seeds
- 150 g boiling water
Day 2
- Wet Leaven as above
- 330 g dark rye flour
- 12 g fine sea salt
- 2 tbls molasses (black treacle)
- 220 g water tepid
- 2 tsp caraway seeds optional
- a few mixed seeds for sprinkling on top the loaf
Instructions
Day 1
- Place the starter in a large bowl and add the cold water and flour. Stir with a spoon to form a nice loose mixture, cover. In a separate bowl place the seeds and chopped rye, pour over the boiling water, cover. Leave both at room temperature for 10-12 hours. (Overnight).
Day 2
- Uncover the wet leaven. It should be nice and bubbly and have a pleasant, slightly fruity, alcoholic aroma.
- Now add all the remaining ingredients to the pre-ferment, including the soaked seeds (they will have absorbed all the water). With a large rubber spoon, bring the mixture together and continue mixing for a couple of minutes, until it’s fully combined. Leave for 10 minutes so the flour can fully absorb the water. The wet dough will become slightly firmer.
- Lightly oil your loaf tin and line the base with baking paper. Dust with rye flour.
- Spoon the loose dough in the tin. Smooth the surface with the back of a spoon. Sprinkle with mixed seeds and heavily dredge with rye flour.
- Leave to rise. This can take 1½-3 hours (this largely depends on the temperature of your kitchen) when the surface of the bread starts to crack. It’s ready to bake.
- Preheat the oven 30 minutes before baking to 230°C fan. *See notes or as high as it will go. Place a tray of water at the bottom of the oven. Put the loaf in the oven and bake for 40 minutes turning 180 degrees (so the front is now at the back of the oven) half way through baking.
- Remove from the oven and tip it out of the tin and cool on a wire rack.
- Slice when the loaf is completely cold, it's important to let the crumb set. Best left for 4-5 hours or even overnight.
 Healthy Swedish Chocolate Balls (Chokladbollar)
Hi Louise,
Thanks for this recipe – it is absolutely delicious and also easy to follow!
I needed more time for the pre-ferment and for the proofing, but that was fine as I made the bread over the weekend and was in no rush!
Best wishes,
Jen
@tasteimpressions
Hi Jennifer,
I’m delighted you like this recipe because this is my favourite sourdough. You’re right, room temperature plays a big part in the proving of this loaf. However the maturity of the starter does too. So the good news is the more you bake, the more lively your starter will become.
Thanks for taking the time to comment.
Best
Louise
Nade this yesterday and the hardest thing was waiting until this morning to try a slice. Fantastic, and definitely one that will be made on pretty regular basis. Thanks
Great to hear Sophie :-))
Thank you for this great recipe, but I have a problem: your instructions say to bake for 40 min turning half way through cooking.
I understood this as taking the bread out of the mold and turn it upside down to put back in the mold for 20 more minutes. The result was a mess as it was only half cooked. Did I missunderstand the instructions?
I am very dissapointed, I love this kind of bread.
I hope you can reply.
Hi Marcela, I’m sorry you misunderstood the recipe. When I say turn, it’s not to turn out, but to turn 180 degrees. Hope that makes sense.
I was looking for a better 100% rye bread and I have found it in this! It is so flavourful and not claggy like past loaves I have made. I used more steel cut rye, replacing the same weight of seeds with it. Thank you so much for a great recipe.
Hello Andrea, thank you so much and I’m so pleased you like my recipe. Glad you found the percentage of grains you like.
Dear Louise,
Absolutely love this Danish Rye loaf, easy to follow recipe and so much fun baking it. I didn’t have chopped rye grains but I replaced it with little extra flour. It worked well. This loaf has become a family favorite. Thank you for all your sourdough baking ideas, you are a star.
Love, Helena
So glad you like it Helena and thanks for taking the time to comment☺️
This was awesome! Such a success. I omitted the molasses because I don’t like the bitterness of that flavour.
I have 2 questions. First, can I substitute molasses with honey or maple syrup? They are more runny than molasses. Second,
When I baked it for 40 min, the temp was well below 190, which is the temp I usually take bread out of the oven at, or even 200 F.
My question is whether I should trust the 40 min and not worry about the temp, or make sure that my bread reaches temp before
taking it out. I baked mine about 50 min to get it to 195 when I took it out. I am pretty sure that my bread turned out drier than yours, but it was still SO terrific. Thank you for sharing.
Hi Nili, so glad you like my recipe. You can certainly substitute molasses with honey or maple syrup, they’re all liquids so it wouldn’t make any difference to the loaf. Have you ever tried molasses in a loaf like this? It’s a small amount and in my opinion, doesn’t taste bitter. It also comes with health benefits of iron and magnesium.
Secondly your question about temperature. I have never checked the internal temperature of sourdough, however if you have your oven set at the correct temperature of 230C or 450F (and it helps to turn it on 30 minutes before baking so the walls of the oven are really saturated with heat) then yes I would trust the timings. All the best. Louise
thanks for the recipe. it’s so easy to follow and the result is really good. A lovely bread.
I’m really pleased you like it and found it easy to follow Sandra.
p.s. I should have clarified that I baked it at 450 F (oven temp), and I used a meat thermometer to test the temp inside the
bread about 2 inches in. When I bake sourdough, I always use a meat thermometer to check the interior temp of the bread
to decide when to take the bread out of the oven.
Thank you SO much Louise, I am going to make this loaf again tomorrow and I am going to trust the timing you suggest to see if I can get a slightly more moist loaf by following the 40 min guideline with no thermometer readings.
Happy New Year!
Great, I’m sure it’ll be lovely.
Hi Louise!
Loved your website and this recipe!
I have one question, perhaps you can help me with it…
My loaf turned out with a really nice crumb and texture, but the sourness was a little too strong.
I reduced the proofing time, since the room temp in my kitchen it’s about 26ºC (or more) these days. One hour after pouring the dough in the loaf tin, it was overflowing and i had to transfer it to another tin.
Do you think this adjustment in the sour flavour should be done by reducing the proofing time even more, or at the first stage, after feeding my starter? Maybe the preferment could be left less than overnight? My rye starter’s been really active and the preferment more than tripled in volume (and deflated) by the end of the 12h period…. I’ll keep testing it, since i loved the overall taste and texture, but if you have any thoughts on that matter, it would be lovely to learn from your experience.
Thanks!
Hi Marina, there are so many factors here, let’s try and break it down.
It sounds as if you have an extremely warm kitchen. Sourdough is happiest between 18-23C. Most households drop temperature overnight, this is why I suggest an overnight preferment. I think you will have to cut this time down + you have a really active starter. I can’t give you exact timings on this as, with all things sourdough it takes a little practice to get it right. That said your instincts are right, cut down on the timing for the preferment and the second proving. Good luck and happy baking! Thank you for taking the time to comment :-))
Hi Louise!
Thanks for your reply! Yes, i’m from Brazil and the room temperature in my kitchen’s been around 26º to 28ºC, these days. I’ve been succeeding with wheat sourdough for years, but just began experimenting with rye!
Just so i can have an idea for what i’m looking for in the pre ferment fase, should i use it when after it doubles in volume, or do you use it while still very “young”? I love the taste of rye! I’ll keep practicing, thank you so much! Be well!
Did you leave the preferment for 10-12 hours originally? If yes try cutting that time in half and see how it turns out? You could also try using it when it’s doubled in size. Sorry there isn’t one clear answer. In the second stage, when you see a few cracks appear on the surface of the dough in the tin, it’s ready to bake. I hope this helps! Be well too 🙂
Hi Kelly, I honestly think that’s too long for the second proving, despite being in the fridge.
In the process of baking this now – wondered if you had ever tried shaping and baking in a dutch oven. I’m excited and hope this turns out – will be the first use of my freshly made rye sourdough starter!
Containing only rye flour which is low in gluten and the dough is very wet making shaping very difficult. I make a similar loaf, I prove in a basket then bake in a Dutch oven, it’s lovely but quite different in looks and the crumb is slightly dryer. If you search ‘Finnish Rye Bread’. Hope that helps answer your question.
Thanks so much!
Hi, should I add the water tray just when I add the bread or when I start preheating the oven?
Hi Daniel, add the tray of water to the oven 5-10 minutes before putting the bread in. If you put it in there too early all the water will evaporate.
And another question – I have a loaf pan with a lid. Should I cook it with it, without it?
On second thoughts you will have to see how much it rises when you prove it in the tin. It may be better to revert to my method of adding the tin of water to the oven.
I didn’t add water, and baked with a lid for 30 mins and 15 without. Came out great!
Really pleased to hear it!
Hi, I’ made this bread 2 now and it’s underbake everytime. I even tried to increase time for adding extra 10 min. Do you have any idea why would that be? Thank you so much!
Hi Dorata, I believe it’s because the flour differs from country to country. Please try adding 20g less water on Day 2. Hopefully this will sort the issue.
This really is a wonderful recipe which creates a truly delicious bread. The instructions and ingredients are very clearly written and Louise’s guidance is instrumental in achieving a remarkable Rugebrød.
I the recipe made a large bread, dense, delightfully seeded and delicious. It kept for a week inside a linen bread bag in my pantry. We ate it traditionally with cream cheese & smoked salmon, toasted with my home made Seville orange marmalade and as open sandwiches with avocado and chicken plus super with poached eggs.
An all round winner and baking again today after its overnight slumber.
Thank you for sharing this recipe, it will remain a favourite here.
Definitely a five star recipe
Thank you again Pauline :-))
Pauline, thank you so much for taking the time to comment. I’m delighted you like my recipe, it’s certainly loved in my house. It is a large loaf that keeps remarkably well as you mention however I have halved the recipe successfully, I then use a 450g loaf tin. :-))
may i have the.measurement of your 1.5kg loaf tin please?
Hi Michelle, the measurements are 30 x10.5cm and it’s 7cm high.
I made this yesterday exceot for the pre-ferment, instead of 290g cold water, I used 150g lacto-fermented pickle juice and 140g of whey. And I left out the chopped seeds and chopped rye grains as I didn’t have them handy but did include the caraway seeds in day 2. No need to worry about this keeping very long – it will likely be gone tomorrow! It’s delicious! My mother-in-law raved about it and she’s a sourdough bread baker herself. Thanks a bunch for the recipe!
So pleased it was a success and you enjoyed the loaf Jerry.
Hi, do you think this recipe would work with Spey flour?
*spelt
Yes I do think it will work with wholegrain spelt, it just may not be as dark.
Thank you for this great recipe, but I have a problem: your instructions say to bake for 40 min turning half way through cooking.
I understood this as taking the bread out of the mold and turn it upside down to put back in the mold for 20 more minutes. The result was a mess as it was only half cooked. Did I missunderstand the instructions?
I am very dissapointed, I love this kind of bread.
I hope you can reply.
Hi, I’m sorry the instructions were not clear. What I meant was to turn the loaf tin 180 degrees, so the front then faces the bake of the oven. Hope that makes sense.
A great recipe thank you😇 Want to bake it again but don’t have dark rye available. Can I use rye instead ?
The bottom of the bread seems a bit moist . Could that be from the tray of water below?
Thank you 😇
Glad you like it! Do you mean you only have light rye flour? It will look very different but it will work. I would use 5% less water with the light rye. I think the original loaf was moist at the bottom because it was slightly under baked. Maybe add an extra 5 minutes next time? All ovens vary.
Hi Louise,
I love this bread and I want to try your recipe using my rye sourdough starter. I keep it in the fridge. Do you suggest to take it out in the morning, refresh it land eaving it out of the fridge util the evening when I’ll start withe the recipe? Thanks
Hi Valentina,
As long as your rye starter is active, i.e. fed in the last 2 days, you can use it straight from the fridge. Hope this helps.
I’ve had a few attemps at rye bread recipes from various sources and just tried Louis’s recipe today. I am delighted with the results and will be making this bread regularly from is on. I think the starter enjoyed the hot weather as the overnight pre- ferment was very lively and we were ready to bake after 2 hours proofing. I’ll be trying out different seed combos too. Thank you so much for this recipe.
It’s a pleasure Susy, I’m so pleased you like my recipe :-))
I have a question. My loaf was delicious but its a bit sticky on the knife when you cut it. Does this mean I underbaked a little?
This would very much depend on when you cut into the loaf as it needs to settle after baking. Nothing less than 4 hours is what I recommend but honestly it’s best left overnight. If you have left it for the recommended then I suggest baking it for an extra 5-8 minutes. Obviously all ovens vary. Hope that helps Susy.
Thank you for this. I’m at the moment exploring more and more flavours for sourdough, mostly interested in rye, and I found this. Will definitely try this ASAP. Thanks again! So much deserve a follow on Instagram and subscription as well!
Carlo_Panadero
Please let me know what you think Carlo. I make this bread every week, my family love it :-))
Hello can you use normal starter instead of rye starter?
Yes you can. Alternatively you can feed a portion of your starter with rye flour to convert it then use it to make the preferment. Hope that helps.
A friend brought this to a game night party and we fell in love with it. Now I’m a subscriber and plan on making this bread. Moist, delicious, healthy. Loved it.
That’s great to hear Melinda. Thanks for taking the time to comment, it’s much appreciated:-))
Thank you for this recipe. I made it and it tasted great but the texture was a bit too moist. I baked it for 45 mins and stuck to the recipe. Could it be that I did not proof it for long enough? Should I add bit less water? I let it rise for 10 hours on the first proof and then 2 hours in the tin.
Hi Juliette, there are so many variables with sourdough baking it’s hard to say if you proved it for too long. Did you leave the loaf for 3-5 hours slicing? My best advice would be when you bake it next time, wait until the next day before slicing. I hope this helps.
This recipe looks great! I fell in love with this bread when visiting Denmark several years ago, and now I will be able to make my own. I’m just puzzled as to where to obtain rye grains, and all the seeds. Do you have a good USA source?
Hi Peggy, you could try an online wholefoods store. Other than that I wouldn’t know what to suggest as I don’t have any know sources in the USA.
Thank you for sharing this wonderful recipe, Louise. It is very easy to follow and taste delicious. So far, I have made it 3 times using half the recipe and shorter proofing time cos weather is warm where I live. I baked at 230C with hot water in over. The 2nd & 3rd bakes, the center part of bread sunk. What do you think is the problem?
Hi, happy to hear you like my recipe but obviously frustrating for you it hasn’t turn out as expected on the 2nd and 3rd attempts. To me, it sounds over proved. Especially as you describe the centre part had sunk. Was there a hole in the middle? I suggest, If it’s really warm where you live, cutting down on the pre- ferment time as well as the proving time. There are so many variables with sourdough baking but I hope this helps.
Thank you for replying so promptly, Louise. My family just had a yummy lunch with the rugbrod and its mostly gone LOL I will shorten the preferment for next bake and observe.
Hij Louise,
This is a fantastic loaf! I was so surprised. I calculated the total dough hydration to be around 93% (including the leaven), poured the dough into the tin and thought to myself ‘here comes a brick’. The reality was it’s probably one of the best 100% rye loaves I’ve ever baked; soft and springy, not at all dense. Magic.
Thanks
That’s right, it is 93% hydration! I’m so pleased you like it! :-))
This is my first try at this bread. I live in Canada where Rye grains are basically unheard of. I was lucky to find Rye flour. I have substituted wheat kernels, which I hope will work! Please advise. Also, the recipe calls for caraway seeds but its not mentioned in the directions. I assume I add them to the rest of the seeds? please adivse again.
Hi Janet, wheat grains will work or you could try seeds? Just add the caraway on day 2 when you mix the remaining flour, water, salt & molasses into a dough and then do the final prove. I’ll amend the recipe. Good luck!
Hi Louise,
I just returned from Scandinavia and loved having this bread in the morning. I was hoping to find a bread machine recipe for Rugbrød. Any chance you know how to modify yours for a bread machine ? Thanks so much ! Janice
Hi Janice,
Very happy to hear you enjoyed the Scandinavian bread. Sadly, I have never used a bread maker, so I’m unable to help you.
Louise
We are a Danish/Canadian family now living in Canada. I have been baking Danish style rye bread for years perfecting my non-sourdough recipe. I was using buttermilk but after learning I cannot eat dairy I had to try something new. Sourdough starter is something very new to me yet the bread turned out delicious.
This recipe is excellent! Easy to follow and my bread turned out great.
Thank you for sharing this.
So happy to hear this Veronica. This is a weekly bake in my house, we never tire of it.
Hi Henry,
I’m really please you like the recipe and that it went according to plan. You are absolutely right, the tin size should be 1.5kg. I will amend and I’m glad you were able to use the extra dough. Thanks Louise
Absolutely brilliant recipe and incredibly simple to make. This is the best Rye bread I have tasted and even better when it’s homemade. Thank you for sharing your recipe.
Hi Alex, I’m so delighted to hear this and thank you for taking the time to comment. It’s much appreciated.
Thrilled to have found this recipe. The bread turned out beautifully and is exactly what I’ve wanted to make for years. This is quickly becoming our standard loaf at home.
So lovely to hear Louisa :-))
Hi Louise-
what a wonderful recipe!!
Can you tell me the dimensions for your 1.5k loaf tin.
Thank you,
Rico
Hi Rico,
Thank you!
Sure the tin I have is 30 x 11cm and 7cm deep. Hope this helps.
I have made this bread several times and I love it and so do my friends. My starter is made with rye and is very active. We have now transitioned to Spring, but here in Canada it still feels like Winter so my kitchen is on the cool side. I have left this bread to rise at room temperature and it has risen, but never cracks. Sometimes it can take up to 10 hours to rise and still it never cracks. I bake it and it turns out fine, but was wondering why it doesn’t crack. I have also placed it in the oven with the light on and the door slightly ajar and again it rises, but never cracks.
I recently bought a Pullman pan as I think it works better with wet doughs.
Hello Erika,
How puzzling. When you say it can take up to 10 hours to rise, is that ones you have put it in the tin?
Also when you bake the loaf, do you put the lid on the Pullman?
We love this bread, I make it often. Thank you for the recipe and clear instructions!
I’m very happy to hear that Janet :-))
Hi
Just starting out with sourdough, at what point do you keep some mixture back for the next starter please? Thanks
Hi Linda,
Once you’ve fed your starter and it’s doubled in volume (assuming you’ve calculated what you need for the recipe and a little left over).Take enough for the recipe and keep the remainder to feed the next time you wish to back. Hope that makes sense.
Hi Louise,
Recently came back from Denmark and wanted to try this recipe. My friends sent me home with maltmel mork. I think you use molasses in this recipe instead? Have you tried this bread with the maltmel mork and any recommendations on how to make the substitution?
Thanks,
Theresa
Hi Theresa,
I haven’t ever used it I’m afraid. Sorry I can’t be of more help to you.
Delicious bread! I did find that after baking for 40min it was still a bit sticky when I cut it after cooling overnight. Not sure if an extra 5-10min might have changed that? Regardless, an absolutely wonderful texture once toasted. Thank you!
Hi Eve,
As you know all ovens vary, you could try an extra 5 minutes. However this is a fairly moist loaf.
Hi Louise,
I have been following your recipe for a while now and made multiple rye loaves, but it keeps coming out sticky in the middle after baking. I tried adding more time to the bake and let it stay for at least 12 hours before cutting each time. Any advice?
Hi Gabriele, mmm, strange! The only thing I think it may be is that flour does vary from country to country (not sure where you live). My suggestion is you take less water on day 2. Instead of 220g, take 200g. Hopefully this will help.
plan on making this as part of a homeschool history unit for my daughter. I have a smaller bread loaf tin, it’s a 9×5 with a depth just shy of 3 in. I’m wondering how full I should fill the batter in my tin? Also any opinions are welcomed if I should reduce cook time or temperature. Thank you!
Hi Nicola,
My tin can hold 1.5kg of dough. If you can tell me how much your tin can hold we can try and work it out from there.
Louise-
I was able to pour 1.75kg to the very top of my tin.
Then you can absolutely use your tin with the full quantity of dough. Baking time will be approximately the same too.
Louise-
I am thrilled that this bread, my first ever time using a starter, was a success! The final proof did take 5hrs to develop cracks & some rise but it was worth it! 45 mins in oven. The inside is soft, dense & beautiful. This recipe is THE one!!
Nicola, I am so pleased you had a great result. The more often you feed your starter, the better the result. So satisfying isn’t it? :-))
Very yummy bread and as everyone here says Louise, your instructions are so clear and easy to follow! I used dark syrup here because that´s all I had and it came out great!
Can´t wait to try many other of your recipes- especially the chia seed loaf and high hydration sourdough!! 🙂
So lovely to hear Kristi! Thanks for taking the time to comment. :-))
I’m glad you like it 🙂
Hi. I just purchased two loaves of wonderful rugbrød from an amazing artisan sourdough bakery in the Hudson Valley, NY. They mentioned something about the bread continuing to improve in the coming days, but how should I store the second loaf so that it remains relatively fresh and viable over the next 1-2 weeks, it that is possible. Thanks! Tom
Hi, I do agree, the crumb needs to set for 24 hours. I can only comment on the sourdough I make, it is good for up to 5 days, or more. (it does of course dry out).
Hi Louise , What do you mean by turn it half way through please? Turn the tin around or turn the loaf over inside the tin? Thanks Susan
Hi Susan, when I say turn it, you should turn the tin around so the back of the tin then faces the front of the oven.
hi Louise, I’ve been baking this bread for several years now. it’s straightforward to make, very consistent and extremely well balanced. an easy eating loaf, especially for those trying Northern European whole grain rye breads for the first time. I run a little bakery in the village of Yellow Springs, Ohio and this rugbrød is in regular rotation. it’s a bread with a loyal following. thank you so much for sharing your recipe. I thank you and a few others in Ohio do as well.
Hello Helena, well this is just wonderful to hear, thank you for taking the time to write to me, it’s much appreciated.
Hi Louise, I have been making your sourdough bread for over 2 years now. We love it, so thank you for the recipe. I would like to try a variation by adding olves to the bread as my adult son keeps asking me to make olive bread. I have made sourdough bread with olives before but the time required doesn’t work with my lifestyle. I really like the no knead, the no ‘fold and stretch’ approach with this bread. Do you think I can just add olives to the dough before adding it to the pan for the final rise?
Should I leave out the seeds and just use a little more of the caraway seeds?
Would love your input before I try anything.
Hi Lena, I’m very happy to hear you like my recipe. You can certainly add olives in the final stage, and yes omit the seeds and maybe add nuts instead, ie. walnuts and pistachios, and fennel seeds would be nice in place of the caraway – a fusion sourdough!
Thanks Louise. I’ll let you know how I go.
Hi Louise,
Just wanted to let you know that the bread didn’t taste great when I added olives and removed the seeds. I’ll stick to your recipe which is delicious in the future:)
It was worth a try, otherwise you would have always been curious.
I made this bread to be used in a traditional Danish smørrrebrød. For the last few decades it has been getting more and more difficult to find rugbrød in stores here in Canada, so I am so pleased to find this recipe! It turned out perfectly! Taste and texture exactly as I remember from childhood!
It would have been great with the caraway but some of us don’t enjoy it so I omitted it. Also couldn’t find chopped rye so used Red River cereal in place of all the grains and seeds except for the sesame. It was easy to make and turned out perfectly using my Pullman pan. I baked it with water pan, lid on for first half, turned and lid off for the 2nd half.
Question: my pan has 3 little holes in the bottom (on purpose lol). I used the baking paper but punched through to open the holes. For next time, do I need to do that? Or do I really even need the baking paper? It came out of pan fine.
Hello Lynda, thanks for taking the time to comment, and I’m glad you like my recipe. If your Pullman has a non stick coating, I would just brush with oil or butter, and not use the parchment paper.
I became obsessed with rugbrød after visiting Copenhagen a few months ago. Never had anything as good as smørrebrød here in California. My first attempt at making it was a total fail (had to be composted. Yes, THAT bad) because I was trying to follow a recipe using deciliters as the unit of measurement. I tried to guesstimate it into grams (which is pretty much impossible if you don’t know the density of the material you are trying to weigh). Then I stumbled on your recipe and SUCCESS, right off the bat! I’m elated. Perfect texture, rich, earthy, and hearty. Only substitution I made was using barley malt in place of molasses. Thank you for sharing your talent!!! Viva smørrebrød! YUM!!
Bernadette, I am so delighted to hear this! Thank you for taking the time to comment :))