• Skip to primary navigation
  • Skip to main content
  • Skip to primary sidebar
  • Skip to footer

Nordic Kitchen stories

Inspired by family recipes

  • Home
  • Recipes
    • Baking
    • Bread & Buns
    • Breakfast
    • Brunch
    • Cakes
    • Canapés
    • Desserts
    • Dinner
    • Drinks
    • Festive
    • Foraged Food
    • Fika
    • Fish
    • Healthy
    • Lunch
    • Main
    • Meat
    • Pickling
    • Preserving
    • Scandinavian
    • Snacks
    • Sourdough Baking
    • Soups
    • Starters
    • Vegan
    • Vegetarian
  • Bespoke Cakes
  • Workshops
    • Sourdough Baking Workshop
    • Nordic Baking Workshop
  • Photography
  • About

Seeded Sourdough Knäckebröd

31st January 2021 By Louise 2 Comments

Seeded Sourdough Knäckebröd

Knäckebröd or crispbread are widely baked in the Nordic region. Their origins lie in Sweden and Finland where they have been baked in their current form for around 500 years.

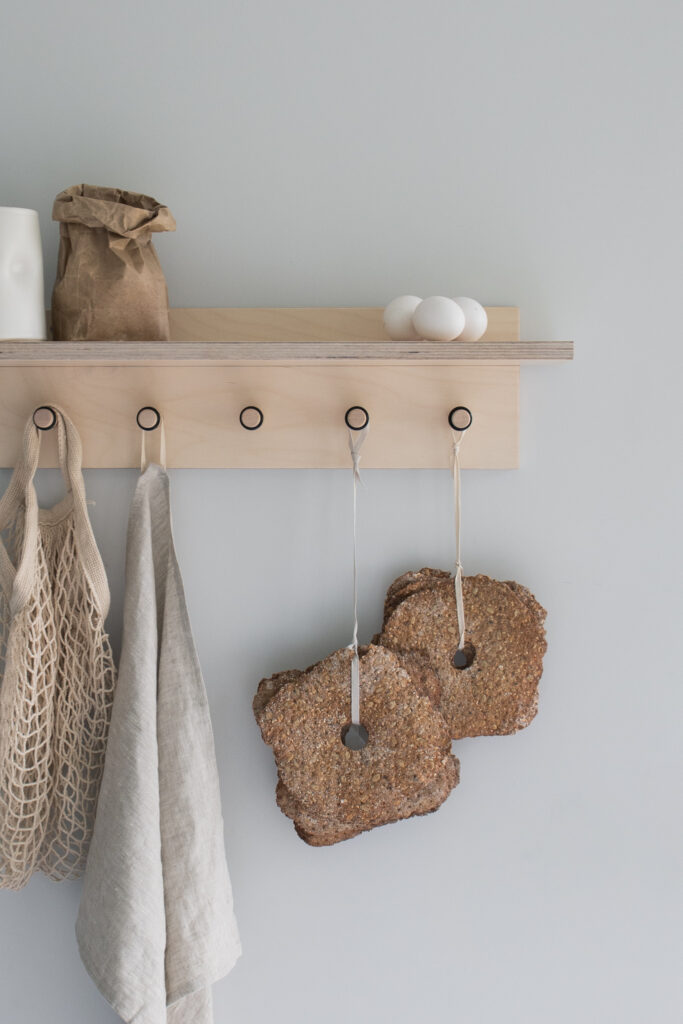
You may wonder why they have a hole in the middle?  Before the invention of the iron stove, baking these crisp flat breads was something people did in the rural farming communities, after the harvest and in spring. The hole in the middle was there to assist with the drying-out and hanging of the bread on long wooden poles above an open fire. 

This thin, hard bread is a staple in my house.  I like to make several different varieties. In this recipe for Sourdough Knäckebröd I’ve added seeds because I adore the combination of flavours and texture.  The sourdough starter adds a wonderful acidity to these crispbreads. It’s also ideal for using discard, on the other hand you can also use an active starter too.  If you’re not a sourdough baker, just use 22g extra water in the recipe and add the dried yeast to the flour.

Seeded Sourdough Knäcke- sandwich

Seeded Sourdough Knäcke- sandwich

Once the dough has proved, it’s time to roll the little buns out.  You’ll need a light dusting of flour on the work surface and a rolling pin.  Try and roll into an even thickness to a diameter of 18cm.  Then roll over with a dimpled rolling pin, this isn’t essential, a fork will do the job too.

A dimpled rolling pin isn’t essential, a fork works just as wel.

Ideal as a snack but also perfect for breakfast, lunch or after dinner to accompany a cheese board.  They store well in an airtight container for several weeks, if they last that long!

If you prefer a Knäckebröd recipe without seeds, then click here.

Seeded Sourdough Knäckebröd
Print Recipe

Seeded Sourdough Knäckebrod

Prep Time35 mins
Cook Time16 mins
Total Time51 mins
Course: Snack
Cuisine: Swedish
Servings: 17 crispbreads

Ingredients

  • 280 g strong wholemeal flour i.e. stoneground, spelt, kamut
  • 100 g dark rye flour
  • 45 g rye sourdough starter, 100% hydration or 22g extra water with ½ tsp fast action dried yeast
  • 275 g water
  • 60 g sunflower or pumpkin seeds or a blend of the 2
  • 60 g sesame seeds
  • 60 g linseeds
  • 1½ tsp caraway seeds
  • 7 g fine sea salt
  • extra flour for rolling

Instructions

  • Combine the flour and salt, (& fast action yeast if using) in the bowl of a free standing food processor with a dough hook attached. Stir the starter into the water and pour over the flour. Run the machine at the lowest speed for approximately 4 minutes. Turn the speed up and continue for a further 2 minutes. Add the all the seeds and run the food processor for a further 2 minutes on high speed. The seeds absorb a lot of moisture and the dough should now be firm.
  • Let the dough rest for 30 minutes before dividing it into 50g pieces. Shape into buns. There’ll be approximately 17. Cover with plastic to prevent drying out and leave in a cool room overnight or in the fridge. (Up to 14 hours).
  • Pre-heat the oven to 180°C fan, put a large, flat baking tray in the oven on a low shelf.
  • Sprinkle wholemeal or rye flour on the work surface and roll each bun to 18 cm in diameter. It’s important they’re even in thickness so work carefully to achieve this. Cut out holes in the middle if desired. If you have a Swedish dimpled rolling pin, roll it over each crispbread, if not, prick with a fork, all over the surface. Place four at a time on the hot baking tray, if it's big enough. Bake for 7 minutes, then turn over and cook for another 7 minutes. Keep an eye on the first batch, as every oven varies. You may have to adjust the cooking time accordingly. The crispbreads should be golden in colour.
  • Once you have baked all the crispbreads turn the oven off and leave until it has cooled right down.  Place the crispbreads back on the baking tray, it doesn't matter if they're piled on top of one another and return to a pre-heated oven (110°C) and bake for a further 20 minutes. Leave to cool in the oven.
  • Store the crispbreads in a airtight container. Suitable for breakfast, lunch, snack and as an accompaniment to a cheese board.

Notes

*I use a rye starter in the majority of my sourdough breads.  However this recipe works with a white starter too.

Tips:

  • You can use any combination of wholegrain flour, I like to occasionally just use rye.  However there are many ancient grains available now ie. einkorn, khorasan, spelt and emmer.


Share this:

  • Print
  • Facebook
  • Twitter
  • Pinterest

Filed Under: Baking, Bread & Buns, Brunch, Healthy, Scandinavian, Snacks, Sourdough Baking, Vegan, Vegetarian Tagged With: healthy, nordic flavours, scandinavian, scandinavian flavours, sourdough starter, vegan, vegetarian

Previous Post: « Swedish Semlor (Lent Buns)
Next Post: Mazariner (Swedish Almond Tarts) »

Reader Interactions

Comments

  1. Rosemary Holloway

    21st February 2021 at 9:11 pm

    Any ideas where to buy a dimpled rolling pin please?

    Reply
    • Louise

      21st February 2021 at 9:21 pm

      Hi Rosemary, I’ve had mine for sometime and bought it in Sweden however I know they’re available to buy here. https://www.bakerybits.co.uk/crispbread-knobbly-rolling-pin-kruskavel sell them. It’s not essential to have this, a fork will do the job very well too.

      Reply

Leave a Reply Cancel reply

Your email address will not be published. Required fields are marked *

Recipe Rating


Primary Sidebar

About Louise

Hej, I'm Louise, a food enthusiast living in Marlow, Bucks, UK. Welcome to my culinary adventures in my Nordic Kitchen. Read More

Contact Louise

Topics

  • Facebook
  • Instagram
  • Pinterest

Newsletter

Please subscribe to receive all new recipes by email.

Latest posts

Wild Garlic and Crab Ravioli

1st April 2022

Charred Cabbage with Cauliflower, Miso puree.

Charred Cabbage with Cauliflower, Miso Purée

16th March 2022

Braised duck with Spiced Barley

Braised Duck Legs with Spiced Barley

27th February 2022

Swedish Sourdough Skorpor - (Rusks)

Swedish Sourdough Skorpor – (Rusks)

25th January 2022

Coconut and Spinach Dhal

Coconut and Spinach Dhal

20th January 2022

Footer

Follow Me on Instagram

As much as I love holidays and eating out, I do cr As much as I love holidays and eating out, I do crave a home cooked meal when I return. Lots of veg here, with a spicy peanut sauce (I add the juice of a lime to this to cut through the richness). This sounds complicated to make but it’s actually quite simple. 

Shiitake & Broccoli Satay, Peanut Sauce.

150g shiitake mushrooms
200g tenderstem broccoli 
3 Tbls soy sauce
1.5 Tbls lemon juice
1 clove garlic, minced
1 tsp minced ginger

130g red cabbage, shredded
Fine sea salt
1 Tbls white wine vinegar
 a handful beetroot leaves (because they were in my fridge & needed eating)
75g crunchy peanut butter
2 Tbls soy sauce
1 lime
1/4 tsp nutritional yeast
A good pinch chilli flakes
1 tsp runny honey
1 small clove garlic, minced

Served with 
Pre-blended Brown basmati, Camargue & wild rice blend. 

Begin with marinating the mushrooms & broccoli. Set to one side for 15 mins.
Place the cabbage in a bowl, season with salt and vinegar, massage and set to one side for 15 mins.
Place the peanut butter in a bowl, add the soy sauce, lime juice, chilli flakes, garlic and nutritional yeast, stir. Add 20-30 ml boiling water or until you have a runny emulsified sauce.

Sauté the mushrooms and broccoli on a high heat with the marinade in a frying pan with a tablespoon or so of water for 2-3 minutes. Tip into a warm bowl and cover.
Now briefly stir-fry the cabbage for 1-2 mins, then add the beetroot leaves, if using.
Spread the satay sauce on the plate. Add the cooked rice, then the vegetables. Top with chopped nuts and toasted seeds.
I’m writing this post from the beautiful city of I’m writing this post from the beautiful city of Porto, we are enjoying a few days stay. It feels so good to travel again. I’ve shared on stories our incredible meal @semea last night. But here’s a dish I made before we left…

This dish is a wonderful summer meal. The salad is also delicious in its own right or with chicken. I make it in advance, adding the beans when I am ready to serve. You can play around with the quantities and could add crumbled feta, or seeds and nuts etc.

Miso Salmon with pickled shallot & Chilli

2 salmon or sea trout pieces
2 tsp white miso
2 tsp runny honey
2 tsp Japanese soy sauce
2 tsp rice wine vinegar 
1 small clove garlic, minced
1 tsp minced ginger 

Combine all of the above and marinate the salmon/sea trout for 20 minutes before cooking.
Heat the oven or Airfryer to 180C and bake for 5 mins in the Airfryer or 8-10 in the oven. Grill for 1 minute to caramelise. (Or could be BBQ’d)

Fennel & Bean Salad
1 bulb fennel, very finely sliced, (I used a mandoline)
A handful French beans, blanched
Broad beans, podded and skinned

Dressing
1 tbls Lemon juice
1 tsp White wine vinegar 
3 Tbls Rapeseed oil
1 small clove garlic, minced
Fresh parsley leaves

Pickle 1 finely sliced chilli & shallot in 2 Tbls rice wine vinegar, 1 1/2 tsp sugar & 1/4 tsp salt.

In a small saucepan heat 1 tbls of the rapeseed oil and add the minced garlic, sauté on a low heat. Pour into small bowl and add the remaining garlic oil, vinegar, lemon juice and season. Add to the salad ingredients and toss.
One from the weekend, (you might have seen it on m One from the weekend, (you might have seen it on my stories) a 40th birthday cake for the lovely Ruth, looked as if she had a gorgeous weekend celebrating.

Fresh flowers from @maxwellandwebbpotager
I don't really know what to eat at the moment. Tod I don't really know what to eat at the moment. Today was supposed to be sunny but it seems almost cool enough for something warm for lunch - However I just gathered salad leaves & herbs from the veg patch in the rain, so salad it is.
Griddled Asparagus, raw courgette, peas, broad beans, salad leaves & herbs all dressed in Honey, Lemon & EVOO. Not forgetting the Honeyed Halloumi.

Heavenly heatwave next week…maybe?!
Remember I made lilac sugar last week? Well here’s what I did with it…
Lilac Madeleines, a post gardening teatime treat!

Lilac Madeleines

🌸Lilac Sugar
2 handfulls lilac blossoms, little stems removed
200g caster sugar
In a large jar alternate pouring the sugar and the petals into it. Seal the jar & place it in a cool, dark place for several days. Shake every couple days for 1-2 days.

Madeleines 
2 free-range eggs 
100g Lilac sugar
100 plain flour, plus extra for dusting
100g butter, melted & cooled slightly + extra for greasing
zest of a lemon 
¾ tsp baking powder

A handful unsalted pistachios, blitzed
Lemon juice
Icing sugar

Preheat the oven to 180C fan. Brush the madeleine tray with melted butter then shake in a little flour to coat, tapping away the excess.

Whisk the eggs & the sugar together in a bowl until light & frothy. Fold in the remaining ingredients. Leave to stand for 15 mins before pouring into the madeleine tray.

Bake for 8-10 minutes, or until the mixture has risen a little in the middle and is fully cooked through. Cool the madeleines on a wire rack.  Mix some icing sugar with lemon juice to make a thin glacé icing. Dip the Madeleine in the lemon icing, then the blitzed pistachios.

Best eaten within an hour of baking 😀
With delicate, pure white bell-like flowers, Lily With delicate, pure white bell-like flowers, Lily of the Valley tells us that summer is on the way. The scent is gorgeous but all parts of this plant are poisonous. 

It’s one of my favourite May flowers and supposedly symbolises happiness. What’s your’s?

Copyright © 2022 · Nordic Kitchen stories | Cookie Notice | Website by Callia Web