• Skip to primary navigation
  • Skip to main content
  • Skip to primary sidebar
  • Skip to footer

Nordic Kitchen stories

Inspired by family recipes

  • Home
  • Recipes
    • Baking
    • Bread & Buns
    • Breakfast
    • Brunch
    • Cakes
    • Canapés
    • Desserts
    • Dinner
    • Drinks
    • Festive
    • Foraged Food
    • Fika
    • Fish
    • Healthy
    • Lunch
    • Main
    • Meat
    • Pickling
    • Preserving
    • Scandinavian
    • Snacks
    • Sourdough Baking
    • Soups
    • Starters
    • Vegan
    • Vegetarian
  • Bespoke Cakes
  • Workshops
    • Sourdough Baking Workshop
    • Nordic Baking Workshop
  • Photography
  • About

Fermented Green Tomatoes

6th October 2021 By Louise Leave a Comment

Fermented Green Tomatoes

Fermented Green Tomatoes – Just whisk the salt into the water and pour over the tomatoes.

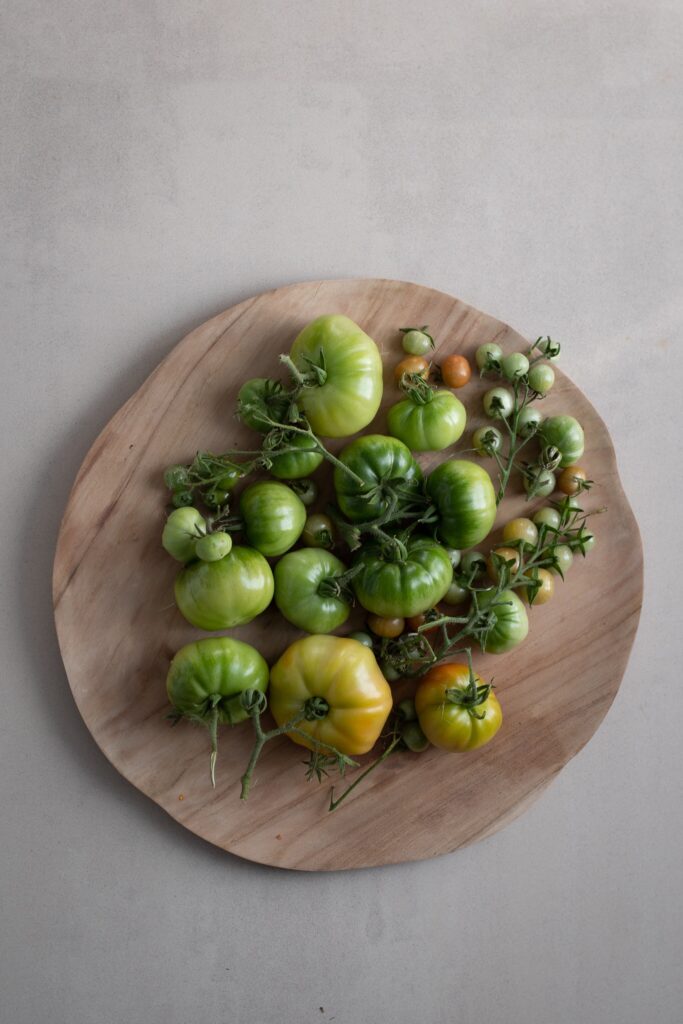
The inevitable part of growing your own tomatoes is that you’ll find yourself with unripe green fruit at the end of summer.  If like me you’re not a chutney lover than why not try Fermented Green Tomatoes!

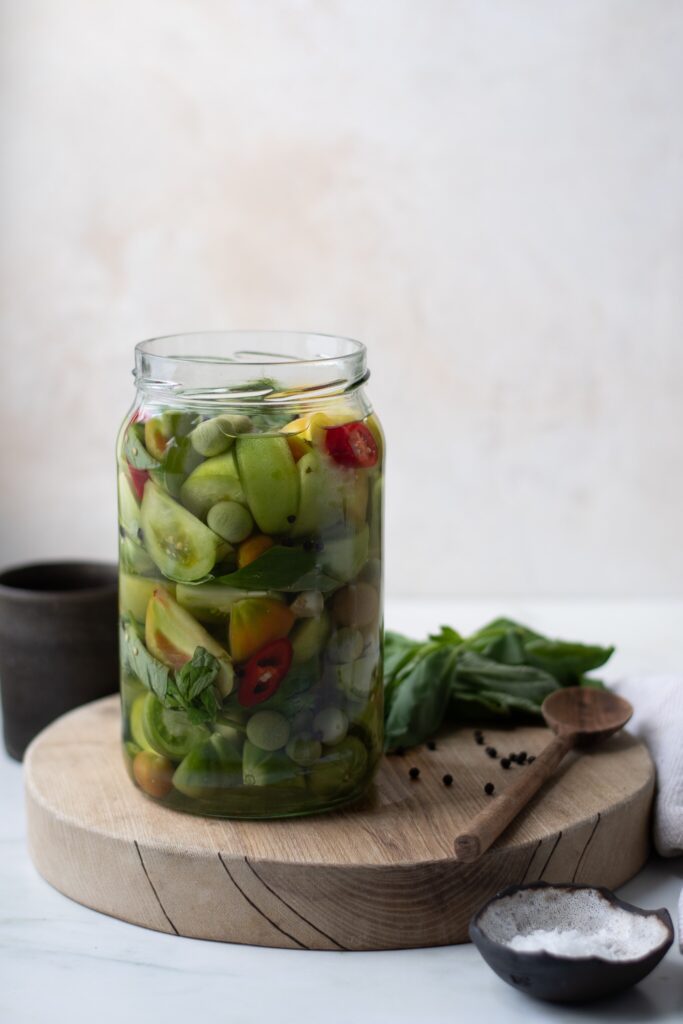
Fermented Green Tomatoes are unripe tomatoes that have been preserved in a mildly salty brine.  With a pleasantly sour, slightly fizzy and marginally salty flavour they tastes similar to traditional pickled green tomatoes. However, unlike the vinegar pickled version, fermented tomatoes are full of probiotics much like sauerkraut, kimchi and kefir.

garden glut geen tomatoes

Garden Glut Green Tomatoes.

You don’t need to go to the expense of buying a fermentation crock, unless you plan to ferment all manner of vegetables. They are heavy and fairly large so you have to ferment a sizeable amount. Another option is a jar with a fermentation seal, they are a good choice for small batches of fermented vegetables, and relatively inexpensive.  I don’t own either of these, I simply use a jar without a seal, it works well; however, I have to ‘burp’ the jars regularly to allow the carbon dioxide that builds up to escape.

Once you have prepared the brine, they can take up to 10 days to ferment.  The process couldn’t be more simple. From day 3 start tasting them, everyone likes a different level of sourness. In this instance I have added garlic, basil and peppercorns, it’s surprising how much they absorb the flavour, they really smell and taste amazingly good.  Other soft herbs work well too ie. dill, thyme and bay.

Green Tomatoes

Green Tomatoes – cut the large tomatoes into wedges. leave the small ones whole.

Tomatoes in Brine

Tomatoes in Brine

DAY 3 -Fermented Tomatoes

DAY 3 -Fermented Tomatoes

I hope you give these Fermented Green Tomatoes a go, I’m certain you’ll love them.

Tomatoes in Brine
Print Recipe

Fermented Green Tomatoes

A delicious and healthy way of utilising green tomatoes at the end of summer.
Prep Time20 mins
Total Time20 mins
Course: Appetiser, Side Dish
Keyword: fermented,, gluten free,, gut healthy,, vegan,
Servings: 1 large jar

Equipment

  • 1 large jar, thoroughly washed and dried.

Ingredients

  • 950 g unripe green tomatoes
  • 900 ml tepid water
  • 25 g Maldon salt or fine sea salt
  • 1 chilli cut into thick slices
  • 1 small bunch basil
  • 3 cloves garlic bruised
  • 1 tsp peppercorns

Instructions

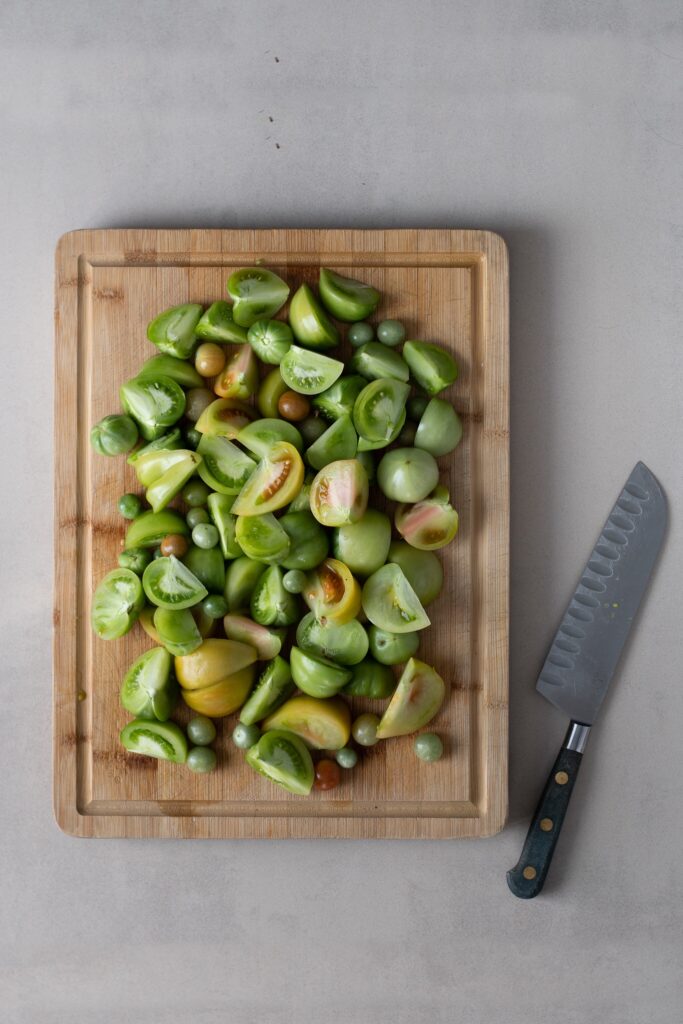
  • Begin with washing the tomatoes. Cut the large ones into wedges, leave the small one whole.
  • Whisk the salt into the tepid water until it dissolves. Next, fill the jar with green tomatoes, chillis, basil, garlic and peppercorns.
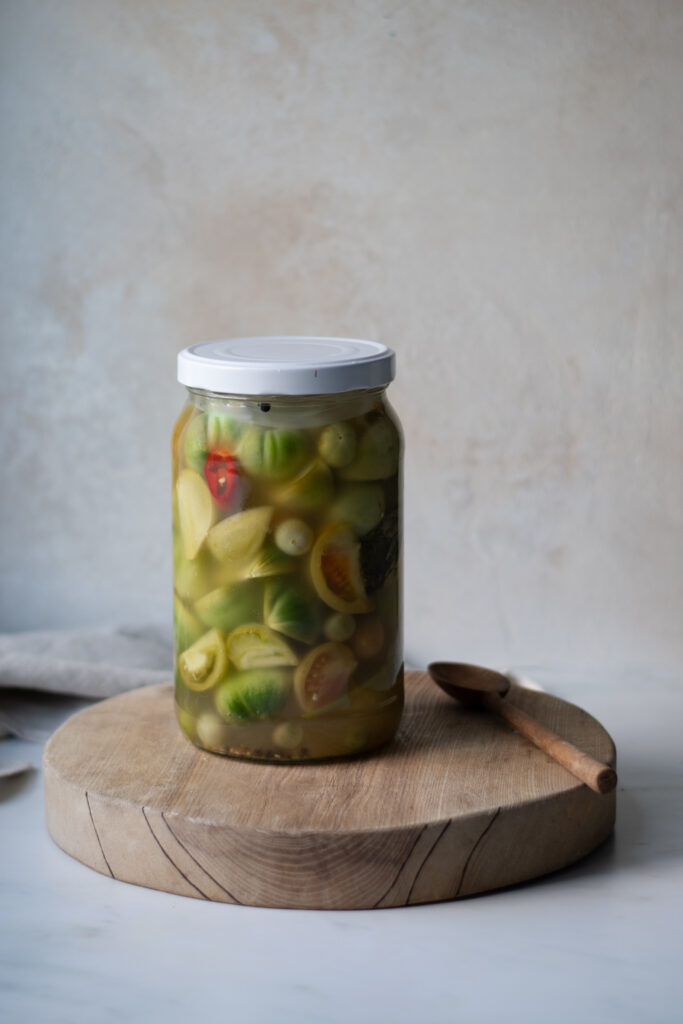
  • Pour over the brine. Now it’s important that the tomatoes are submerged in the brine so either fill a small plastic bag with water, tie a knot and place it on the top to weigh down the tomatoes or I use a silicone stretchy lid, place it upside down in the neck of the jar and fill it with any remaining brine or fresh water. Fit the lid.
  • The brine will become cloudy and a light, white film may develop after a few days on the surface, this is perfectly normal.
  • Allow the tomatoes to ferment for 8-10 days in a cool dark place, such a s a larder. Once you are happy with the taste, store in the fridge. The tomatoes become marginally fizzy once they have been refrigerated. They will keep for up to 4 months.

DAY 8 – they have a good level of acidity and I am happy with the taste.

If you’d like to consume more glut friendly bacteria then you could try this recipe for Water Kefir.

Share this:

  • Print
  • Facebook
  • Twitter
  • Pinterest

Filed Under: Gluten-Free, Healthy, Pickling, Preserving, Vegan, Vegetarian Tagged With: gut friendly, healthy, preserving, simple, vegan, vegetarian

Previous Post: « Apple & Cobnut Frangipane Tart
Next Post: Fluffy Swedish Cinnamon Buns »

Reader Interactions

Leave a Reply Cancel reply

Your email address will not be published. Required fields are marked *

Recipe Rating


Primary Sidebar

About Louise

Hej, I'm Louise, a food enthusiast living in Marlow, Bucks, UK. Welcome to my culinary adventures in my Nordic Kitchen. Read More

Contact Louise

Topics

  • Facebook
  • Instagram
  • Pinterest

Newsletter

Please subscribe to receive all new recipes by email.

Latest posts

Wild Garlic and Crab Ravioli

1st April 2022

Charred Cabbage with Cauliflower, Miso puree.

Charred Cabbage with Cauliflower, Miso Purée

16th March 2022

Braised duck with Spiced Barley

Braised Duck Legs with Spiced Barley

27th February 2022

Swedish Sourdough Skorpor - (Rusks)

Swedish Sourdough Skorpor – (Rusks)

25th January 2022

Coconut and Spinach Dhal

Coconut and Spinach Dhal

20th January 2022

Footer

Follow Me on Instagram

As much as I love holidays and eating out, I do cr As much as I love holidays and eating out, I do crave a home cooked meal when I return. Lots of veg here, with a spicy peanut sauce (I add the juice of a lime to this to cut through the richness). This sounds complicated to make but it’s actually quite simple. 

Shiitake & Broccoli Satay, Peanut Sauce.

150g shiitake mushrooms
200g tenderstem broccoli 
3 Tbls soy sauce
1.5 Tbls lemon juice
1 clove garlic, minced
1 tsp minced ginger

130g red cabbage, shredded
Fine sea salt
1 Tbls white wine vinegar
 a handful beetroot leaves (because they were in my fridge & needed eating)
75g crunchy peanut butter
2 Tbls soy sauce
1 lime
1/4 tsp nutritional yeast
A good pinch chilli flakes
1 tsp runny honey
1 small clove garlic, minced

Served with 
Pre-blended Brown basmati, Camargue & wild rice blend. 

Begin with marinating the mushrooms & broccoli. Set to one side for 15 mins.
Place the cabbage in a bowl, season with salt and vinegar, massage and set to one side for 15 mins.
Place the peanut butter in a bowl, add the soy sauce, lime juice, chilli flakes, garlic and nutritional yeast, stir. Add 20-30 ml boiling water or until you have a runny emulsified sauce.

Sauté the mushrooms and broccoli on a high heat with the marinade in a frying pan with a tablespoon or so of water for 2-3 minutes. Tip into a warm bowl and cover.
Now briefly stir-fry the cabbage for 1-2 mins, then add the beetroot leaves, if using.
Spread the satay sauce on the plate. Add the cooked rice, then the vegetables. Top with chopped nuts and toasted seeds.
I’m writing this post from the beautiful city of I’m writing this post from the beautiful city of Porto, we are enjoying a few days stay. It feels so good to travel again. I’ve shared on stories our incredible meal @semea last night. But here’s a dish I made before we left…

This dish is a wonderful summer meal. The salad is also delicious in its own right or with chicken. I make it in advance, adding the beans when I am ready to serve. You can play around with the quantities and could add crumbled feta, or seeds and nuts etc.

Miso Salmon with pickled shallot & Chilli

2 salmon or sea trout pieces
2 tsp white miso
2 tsp runny honey
2 tsp Japanese soy sauce
2 tsp rice wine vinegar 
1 small clove garlic, minced
1 tsp minced ginger 

Combine all of the above and marinate the salmon/sea trout for 20 minutes before cooking.
Heat the oven or Airfryer to 180C and bake for 5 mins in the Airfryer or 8-10 in the oven. Grill for 1 minute to caramelise. (Or could be BBQ’d)

Fennel & Bean Salad
1 bulb fennel, very finely sliced, (I used a mandoline)
A handful French beans, blanched
Broad beans, podded and skinned

Dressing
1 tbls Lemon juice
1 tsp White wine vinegar 
3 Tbls Rapeseed oil
1 small clove garlic, minced
Fresh parsley leaves

Pickle 1 finely sliced chilli & shallot in 2 Tbls rice wine vinegar, 1 1/2 tsp sugar & 1/4 tsp salt.

In a small saucepan heat 1 tbls of the rapeseed oil and add the minced garlic, sauté on a low heat. Pour into small bowl and add the remaining garlic oil, vinegar, lemon juice and season. Add to the salad ingredients and toss.
One from the weekend, (you might have seen it on m One from the weekend, (you might have seen it on my stories) a 40th birthday cake for the lovely Ruth, looked as if she had a gorgeous weekend celebrating.

Fresh flowers from @maxwellandwebbpotager
I don't really know what to eat at the moment. Tod I don't really know what to eat at the moment. Today was supposed to be sunny but it seems almost cool enough for something warm for lunch - However I just gathered salad leaves & herbs from the veg patch in the rain, so salad it is.
Griddled Asparagus, raw courgette, peas, broad beans, salad leaves & herbs all dressed in Honey, Lemon & EVOO. Not forgetting the Honeyed Halloumi.

Heavenly heatwave next week…maybe?!
Remember I made lilac sugar last week? Well here’s what I did with it…
Lilac Madeleines, a post gardening teatime treat!

Lilac Madeleines

🌸Lilac Sugar
2 handfulls lilac blossoms, little stems removed
200g caster sugar
In a large jar alternate pouring the sugar and the petals into it. Seal the jar & place it in a cool, dark place for several days. Shake every couple days for 1-2 days.

Madeleines 
2 free-range eggs 
100g Lilac sugar
100 plain flour, plus extra for dusting
100g butter, melted & cooled slightly + extra for greasing
zest of a lemon 
¾ tsp baking powder

A handful unsalted pistachios, blitzed
Lemon juice
Icing sugar

Preheat the oven to 180C fan. Brush the madeleine tray with melted butter then shake in a little flour to coat, tapping away the excess.

Whisk the eggs & the sugar together in a bowl until light & frothy. Fold in the remaining ingredients. Leave to stand for 15 mins before pouring into the madeleine tray.

Bake for 8-10 minutes, or until the mixture has risen a little in the middle and is fully cooked through. Cool the madeleines on a wire rack.  Mix some icing sugar with lemon juice to make a thin glacé icing. Dip the Madeleine in the lemon icing, then the blitzed pistachios.

Best eaten within an hour of baking 😀
With delicate, pure white bell-like flowers, Lily With delicate, pure white bell-like flowers, Lily of the Valley tells us that summer is on the way. The scent is gorgeous but all parts of this plant are poisonous. 

It’s one of my favourite May flowers and supposedly symbolises happiness. What’s your’s?

Copyright © 2022 · Nordic Kitchen stories | Cookie Notice | Website by Callia Web